
‘Round the corner came a black horse, no hobbit-pony but a full-sized horse; and on it sat a large man, who seemed to crouch in the saddle, wrapped in a great black cloak and hood, so that only his boots in the high stirrups showed below; his face was shadowed and invisible. When it reached the tree and was level with Frodo the horse stopped. The riding figure sat quite still with its head bowed, as if listening. From inside the hood came a noise as of someone sniffing to catch an elusive scent; the head turned from side to side of the road.’
Time for another Nightmare Review! This time I am not only doing a Nightmare Review but also starting off on my first ever Nightmare Campaign! On my last Nightmare Review of The Weather Hills Estel Edain suggested I play and review Nightmare Saga Quests which was a great suggestion. I pretty much immediately set up Nightmare Shadow of the Past and played a few games. I got absolutely destroyed several times so put everything on hold and then returned back to the quest multiple times over the last few days.
I finally got a win last night after at least 15 or so losses including many games that I had to concede early on, many mulligans and several scoops right at the start of games after the first round of staging. During the eventual win I achieved I faced down two Black Riders and Khamul at the end on Stage 3 and didn’t take a single point of damage from that combat phase and then smote Khamul in one hit! I was also able to travel to Buckleberry Ferry as soon as I arrived at Stage 3 as I was able to clear the only other location in play thanks to succeeding at the Hide test from the Nazgul that the Stage effect brings into play! Had I not been able to travel there immediately I probably would have lost as my decks were at 42 and 43 threat so I had no time no waste.
Although it took as many attempts as it did to grind out a victory it was such an epic and hard earned victory that it made it all worth it in the end. By staying on Stage 1 as long as possible and actually questing unsuccessfully over several turns in order to do so and then questing hard once I got Send for Aid in play I was able to build a very powerful board state with both decks where I had small armies of allies out ready to perform hide tests, kill Nazgul or quest hard. Essentially there was a very obvious tipping point during the game where I was finally able to clear the several high threat locations in staging thanks to two copies of Northern Tracker and was able to lock down combat by getting strong offensive allies out and building up defensive boosts and readying attachments on Gimli (Armored Destrier and UC as well as a few copies of Miruvor, Shield and Warning). This allowed me to get ready for Stage 2 and 3 and somewhat breeze through them thrashing any Nazgul or hide tests I encountered. I did still stall longer than I ended up wanting to on Stage 1 because threat in staging got a little out of my control but the Northern Trackers were able to turn that around. I also did lose several hide tests while on Stage 2 however because of the +1 threat to each hide test based on how many allies a deck has in play as both decks had at least 6 or 7 allies in play. Only once did failing a hide test trigger Nazgul engagement and attacks but thanks to plenty of powerful attachments this meant nothing and I was easily able to defend against this. Luckily I also avoided having any nasty other cards that trigger when you fail hide tests in play during the few hide tests I chose to fail on purpose other than the new location that gains threat when you fail hide tests, because I was able to clear all the other locations in staging over several turns with Northern Trackers these boosted locations were not that much of a threat. The two Northern Trackers definitely turned the game around completely removing something like 14 or so threat from staging over several turns and had they not entered play when they both did I definitely would not have won. Not only this but the only time I performed a hide test in order to travel to a location was to travel to Buckleberry Ferry thanks to the Trackers! I admittedly made a single mistake (I am aware of) by having both the Boon version of Gildor and lore ally version of Gildor in play but I played Lore Gildor on the final round and all he did was quest and I had more than enough questing power without him so this meant nothing in regards to my actual outcome and victory.
Both decks performed admirably and several cards were utterly key to victory:
- Elrond with Vilya was integral to his deck slowly building to a ridiculously strong board state by pumping out cards for free all game. By putting LoV and later UC, Elven Mail and Brand on him he was able to perform whatever duties I needed him for and was a key component to my victory.
- Double Silver Harp on Arwen was key to healing and using her resource boost consistently.
- Gandalf with or without Sneak Attack helped at several critical moments to destroy or weaken Nazgul, to draw extra cards and at one point to lower threat from a very worrying 46 back down to 41. This combo was not abused nearly as much as in some of my losses so I was happy that I managed a victory without going too bananas with this combo that many think is a little too overpowered.
- All three copies of Feint were critical to my win by keeping damage off heroes early game and stopping any nasty shadow effects from triggering and also freeing up extra characters to counter attack that would normally defend; namely Gimli. I in fact used Feint on Khamul during the round he entered play upon arriving at Stage 3 which was the only opportunity he ever had to attack as I destroyed him in one hit that same round during player attacks.
- Sulien was critical during the couple of rounds before the Northern Trackers could clear all the locations in staging. Sulien stopped me from gaining more than a few points of threat at a time when questing unsuccessfully on purpose. Would have lost without her and her ability for sure.
- Armored Destrier ending up discarding several shadow effects that provide additional attacks or attack boosts. Had I not gotten it out in preparation for stage 2 and 3 nice and early I would have lost for sure. Gimli was kept nice and safe throughout the whole game and only ever took a few points of damage thanks to Armored Destrier and his various other attachments.
- Galadriel was ridiculously key to my victory as she lowered both decks threat constantly and provided plenty of card draw while doing so. Had I not had her threat reduction to help with questing unsuccessfully and turtling so long on Stage 1 there is no way I would have won. She actually didn’t get any attachments during this game until she received Nenya a few turns from the end. This was actually pretty weird as usually games where I do not get UC and Nenya on her are not as successful or easy as games where I do get them setup early on.
- Sword that was Broken was insanely good in this quest as it not only boost characters willpower for questing purposes but also helped immensely with hide tests especially considering the combat deck does not feature that many characters with high willpower. Weaker allies like Naith Guide suddenly become much more useful and key to questing and hide tests thanks to the Sword and even Gimli could sometimes contribute to hide tests with a boosted 3 willpower and could then ready with Miruvor or UC still ready for defensive duties on the same turn! Between StwB and a decent amount of allies under the combat decks control, and a massing of allies under the questing decks control, by the time I finally got things under my control I had willpower well and truly handled and there was little the encounter deck could do to combat my powerful board state.
- Power of Orthanc at one point removed two copies of Have You Seen Baggins? from play which both would have triggered the following turn discarding two heroes from play which would have been an automatic loss.
- Two Tests of Will at critical moments were key to reducing the amount of hide tests I had to make and slowing the encounter deck and its nonsense right down.
- Northern Tracker as I already explained above was definitely MVP and if not for them I would have been totally screwed against the ridiculous amount of threat I let build up in staging from locations.
- Send for Aid was perhaps just as critical and allowed me to put both Sulien and a copy of Gandalf into play at a critical moment. It also allowed me to try and actually quest successfully while on Stage 1 without risking arriving at Stage 2 too early and getting clobbered by the new Nazgul that appears when you advance.
I am likely forgetting several key cards that turned the game around such as both copies of Foe Hammer providing insane card draw mid game for the combat deck and allies like Azain and both copies of Fornost Bowman providing the necessary extra attack to kill Nazgul swiftly but it was such a long and grueling game that I simply do not recall every close call or epic moment I had! During several turns in the middle of the game I had Test of Will, Power of Orthanc, Sterner than Steel and Feint in hand (across both decks) ready for just about anything thrown my way. Having these key cancellations and utility cards was critical for dealing with the various horrors this Nightmare Quest can conjure up and by the end all of these cards had been used at key moments.
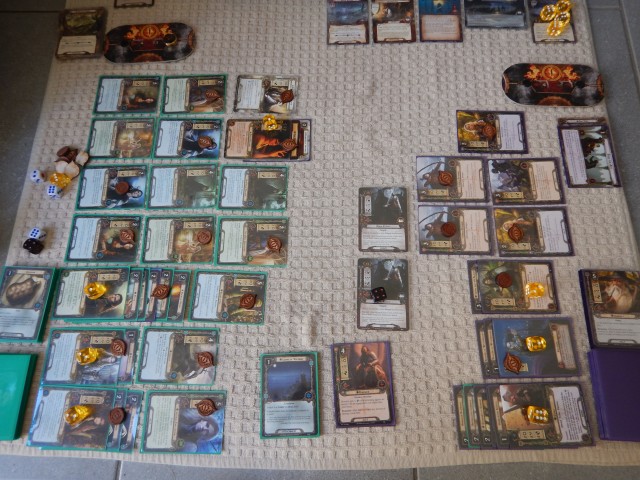
Here is a photo of my final board state upon victory, it isn’t the best quality but you can see the army of allies and attachments I had built up and the more or less empty staging area I managed by the final round, two Nazgul are still engaged (one with four damage) but they pose little to no real threat at this point, Buckleberry Ferry has a ton of progress on it and no characters have any damage on them:
Now that I have gone over the strategy and structure behind my eventual victorynI will go over each actual Nightmare Card and my evaluation of each based on my experiences during these games. I will then go over my Nightmare Campaign choices moving forward as well as the actual decks I used to play this quest as they are fairly different from the last ones I posted in my Current Decks article. Here goes!
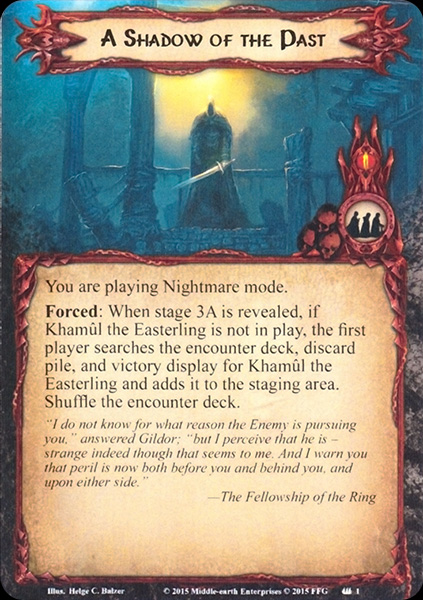
The front side of the Nightmare Setup card has a forced effect that puts Khamul into play when you reach Stage 3. It even fetches him from the victory display or discard pile so even if you somehow managed to get him into the victory display or have already destroyed him you are always going to see him at Stage 3! You already have to fetch a Black Rider when you reach stage 3 so you will always see at least two Nazgul in play when you arrive at Stage 3 in the Nightmare version of this quest and risk immediate attacks from both should you fail the hide test the Black Rider initiates.
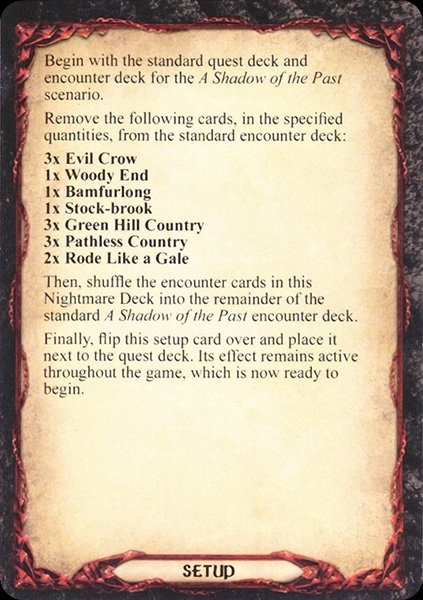
The back side of the Nightmare Setup as always includes the cards you remove from the normal version of this quest when playing the Nightmare version. All the Evil Crows are removed as are pretty much all of the locations that have beneficial effects. Rode like a Gale and Pathless Country are perhaps the only two cards that you could be somewhat happy to see removed as all the others are fairly harmless or actually somewhat beneficial.
This means the Nightmare version of this quest is enhanced not only by the inclusion of nasty new nightmare cards but also by the fact that most of the harmless or beneficial encounter cards, mainly locations, are removed.
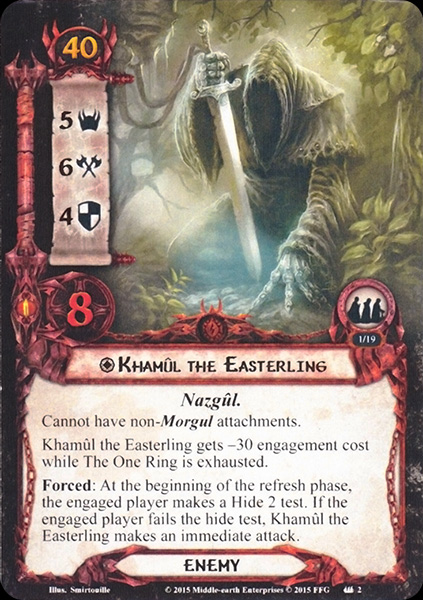
Khamul The Easterling! The only named Nazgul other than the Witch King. We see him in the Nightmare version of this quest and he is pretty damn nasty. Not only does he hit harder than regular Nazgul and have more hitpoints but he also has a seriously horrific forced effect. Essentially if you don’t finish him off quickly he will force you to make a hide 2 test during each refresh phrase he is engaged with you and this will not only make any Nazgul in staging engage and attack you immediately and trigger any other nasty effects in play that trigger upon failed hide tests but Khamul will also make an immediate attack personally with his nasty 6 attack strength.
Now yes Khamul can be an absolutely devastating foe in the right circumstances but he can also be fairly harmless under other circumstances. He does not force a hide test when he appears and enters play so if you deal with him quickly and effectively you can stop him from really doing much at all. Normal Black Riders force you to perform a Hide Test so even if you can deal with their potent combat stats you still risk other effects triggering from failed hide tests and also face them making multiple attacks rather than just one when they enter play. Khamul just makes the one attack the round he enters play so long as you then destroy him. By identifying this key weakness he possesses I was able to deal with him during my eventual victory. That being said he certainly contributed to my demise on a few occasions including one game where both he and another Nazgul both made attacks during the first round thanks to a failed hide test and his attack destroyed a hero which of course resulted in me immediately conceding that game (no avoidable hero deaths in campaign mode allowed!) and starting a new one. Definitely not the worst boss enemy ever but certainly nasty if you cannot deal with him swiftly!
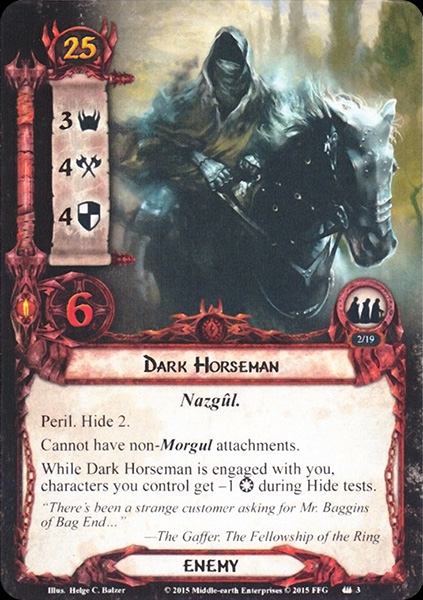
Dark Horseman doesn’t seem so bad.. yes he has Hide 2 like the Black Rider and has a nasty willpower reducer if he stays engaged with you but he has slightly less attack and less threat as well. So long as you can deal with them quickly they are not so bad. Then I remembered that only the Evil Crows are removed from this Nightmare quest as far as enemies are concerned so the inclusion of these Dark Horseman means there are just more Nazgul enemies in general, three more in fact between the Dark Horsemen and Khamul the Easterling! This actually helps this quest a bit as in the past with the normal version of this quest I have had many instances where you do not see any other Nazgul for several turns if you manage to dispatch the ones that appear during each quest Stage quickly and the quest suddenly becomes a lot easier and hide attempts also matter a lot less. In this Nightmare quest this is rarely the case due to more Nazgul in general and more effects that either punish you for failed hide tests or simply force you to make hide tests. Although this “fixes” the quest and makes the encounter cards combo together better it also makes it quite a bit harder while doing so!
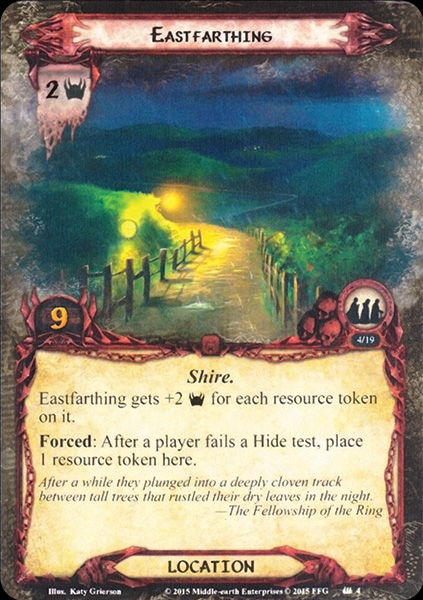
Eastfarthing certainly seems to be fairly harmless compared to the other new locations at first glance as you do not have to perform a hide test to travel there and its effects do not seem that bad. If you fail several hide attempts within a few rounds and are not able to travel to this location for some reason or have multiple buffed copies in play at the same time you will quickly change your mind! It also has a very high 9 quest points so can seriously slow you down if you travel there which you really want to do if it does build up resources and threat. Still not the worst new location but by no means at all harmless and actually quite nasty if you are in a position where you risk failing multiple hide tests.
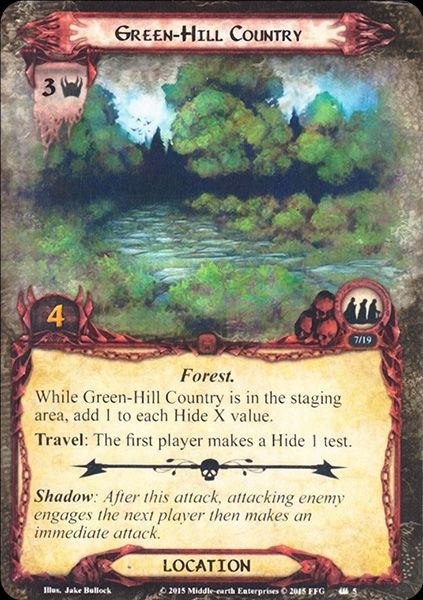
Green-Hill Country is just awful. A decent 3 threat and 4 quest points but a truly awful effect. A simple copy of this location in staging suddenly turns a Hide 2 test from a Black Rider or Dark Horseman into a Hide 3 test that might also be boosted by Stage 2’s inherent effect or an effect like Stock Road. On top of that you have to perform a hide 1 (hide 2 really because Green-Hill Country itself is still in staging…) to travel to this location! This location was awful to deal with and I avoided traveling there at all costs even with its nasty effect while in staging. Northern Trackers in my eventual victory totally neutered this location as well as several others which was essential to overcoming their various effects and high threat in staging. Also worth noting is the shadow effect on this card that provides yet another shadow card that gives a Nazgul an additional attack.
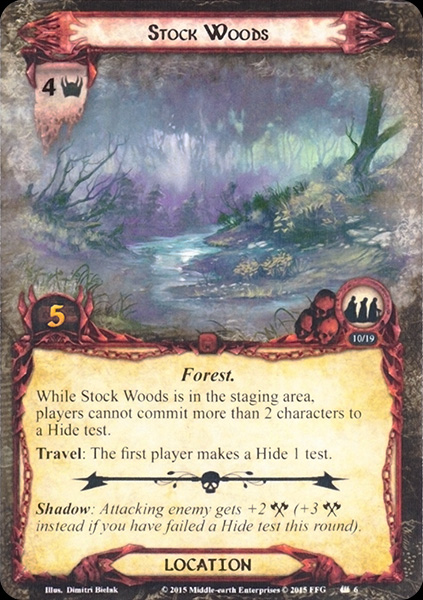
Stock Woods is another horrendous location this Nightmare quest introduces. It combos insanely well with the other two Nightmare locations as well as locations like Stock Road from the normal version of the quest. It stops you from ever committing more than two characters to any particular hide test while it is in staging which can be insane if you are performing a hide 3 or 4 test that is boosted by other effects. This can make certain hide tests next to impossible to achieve without some insane luck. This location also has 4 threat and a fairly high 5 quest points so doesn’t just provide its awful effect while in staging. You have to perform a Hide test to travel here just like Green-Hill Country and again this hide test is boosted by the location itself as you will only be able to commit two characters to the hide test you take to travel to this location. Honestly I can’t decide if Stock Woods or Green-Hill Country is worse and they both contributed heavily to many of my losses. Honestly the location cards in this Nightmare Quest are just brutal as hell and as I mentioned above there is not one beneficial location anymore just a slew of locations that make hide tests worse and worse. This location also has a nasty shadow effect that can boost a Nazgul attack by up to 3 attack strength if you have failed a hide test that round. Like Green-Hill Country, Stock Woods is a “must clear” location that you do not want to leave in play.

In the Name of Mordor is not so bad, yes it is a random card you have to discard and yes this only compounds the damage that failed hide tests can do but it is not that bad in the long run and you can avoid it entirely by not failing hide tests at all or by having it attach to a side quest or even main quest stage you are about to clear or advance from. It does have surge however so immediately replaces itself so is just another punishing effect that appears in a way. I had it trigger on various occasions but also managed to avoid its effect many times as well. Really not that bad of a treachery so long as you can keep ahead of hide tests or manage to avoid its effect in other ways. Still not something you will ever necessary be happy to see appear.
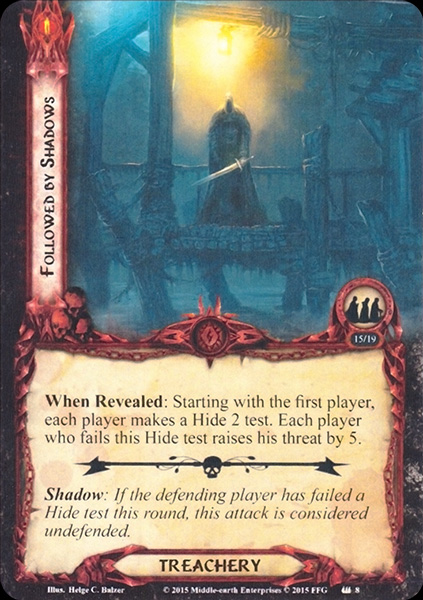
Followed by Shadow is one of the main treacheries to look out for in this Nightmare Quest and one that I found myself cancelling whenever possible. Not only does it make all players perform a Hide 2 test (which again will almost always be boosted in some shape or form by other Nightmare effects or quest effects) but it also raises the threat of any player/deck that fails their hide test by a whopping 5! So not only do these Hide tests risk Nazgul engagement and attacks and various other effects triggering but they can also give you a big threat boost. The shadow effect on this card can be a game ender as it can easily result in a hero loss from an undefended Nazgul attack. Truly a nightmarish treachery card!
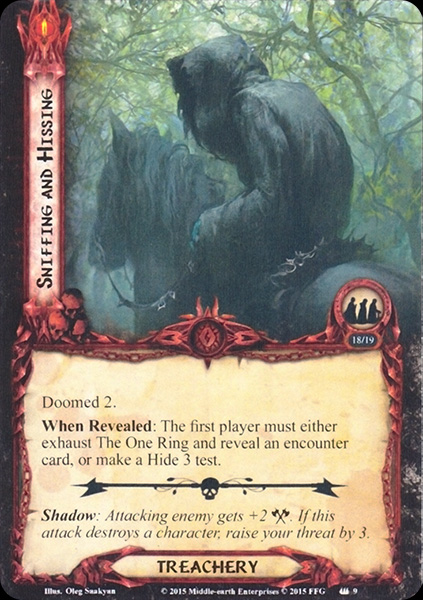
Sniffing and Hissing although nowhere near as bad as Followed by Shadow is still one hell of a nasty treachery card. A hide 3 test is no joke especially if it is buffed by other cards (which it almost always will be) and Doomed 2 is not exactly something you want to see either. You can avoid the hide test by exhausting the One Ring (which is risky it of itself) and revealing another encounter card but honestly most times you do this you are likely going to reveal something just as bad or even worse such as a Black Rider, Dark Horseman, Khamul himself or even Followed By Shadow. I found myself cancelling this treachery whenever possible and when I could not I would usually reveal another card rather than make the hide test. This was usually heavily punishing and I would reveal another card that forces me to make a hide test anyway or instead would have to add yet another nasty location to staging.
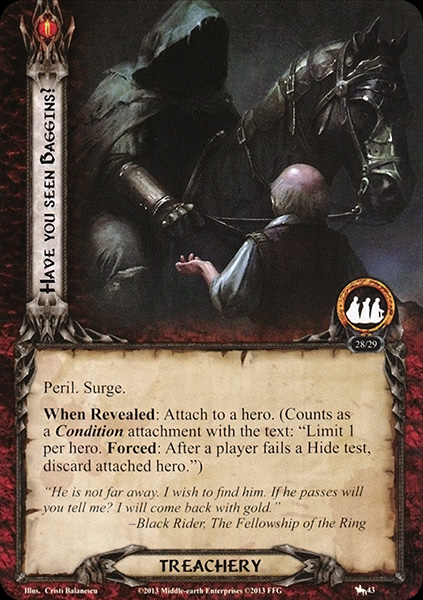
Not a new addition to the Nightmare version of this quest but a card I simply had to talk about in this Nightmare Review. Have You Seen Baggins is never THAT much of a threat in the original version of this quest. Hide tests are not quite as hard, frequent or anywhere near as boosted by other encounter cards in the original and there are even several locations that help you with hide tests! In the Nightmare version this card can trigger so ridiculously easily and was the main cause of honestly the majority of my losses. Don’t get me wrong many other encounter cards completely shut me down during my many losses but this card just wreaked absolute havoc. Several times heroes were discarded by its effect causing me to immediately concede and start new games. I may have even won one of those games had I not seen this treachery appear when it did. Even in my eventual victory I only managed to stop this card from leading to a loss by playing an extremely well timed copy of Power of Orthanc to discard not just one but two copies from play. Even if you cancel this treachery it still has surge (and peril so is harder to cancel anyway!) so will replace itself. Condition removal or serious repeatable cancellation is a must in this Nightmare quest to deal with this particular card or it will lead to a hero loss very quickly and without much warning. This card is easily just as punishing if not more so than any of the Nightmare cards in this Nightmare Saga Quest and it was probably my most hated card during all my games.
CONCLUSION
Overall as much as I did get quite frustrated towards the middle after many losses in a row I did really enjoy this quest and the eventual win I did achieve was extremely satisfying and hard earned. This Nightmare Quest is no joke and it can easily decimate any decks that are not well prepared for the myriad of nasty effects and cards this quest can throw at you. Hide tests are so much more important now and there are not only more Nazgul but they even have one of their leaders present and he can really ruin your day if you don’t have the firepower to take him out quickly. The locations are insane and you need to have some form of location control if you want to stand a chance. Similarly cancellation of both treacheries and shadow cards is key to staying afloat and overcoming certain effects that will spell your doom if you cannot cancel or overcome them. There are no more Crows that you can use attachments or traps on and there are only Nazgul now so every single enemy hits hard and is unforgiving so mediocre defenders are not your friend in this quest and you need a wall of defense to stop your heroes from becoming Nazgul prey.
Many of my losses were because I didn’t want to clear Stage 1 within the first few rounds so I held back from questing properly until I had a better board state. This would lead to threat in staging getting out of control (I wouldn’t travel to locations that force you to make hide tests so would often have no active location either) to a point where I could not retake control from the encounter deck and could not get my board state where it needed to be or I would accidentally advance to Stage 2 anyway way too early and get creamed by Nazgul. Nasty locations stopped me from succeeding at hide tests when I really needed to, treacheries would often shut me down completely or lead to instant losses from hero death due to undefended attacks or Have You Seen Baggins? triggering and Nazgul made attacks that resulted in hero deaths during several of the games I lost. All the losses from Have You Seen Baggins? were the worst ones as they felt unfair or at least so final and unavoidable. That being said more condition removal or cancellation certainly could have bolstered my decks against this treachery. I use the same two decks (with a small sideboard) for every quest and stick to this style of play though so that was not an option. I persevered and my various strategies eventually paid off. Key cards appearing early helped me generate a powerful board state and by avoiding advancing to Stage 2 too quickly I was able to use this time to adequately prepare for the rest of the quest.
Admittedly I did struggle a lot at the start but after several losses I got used to what the quest was throwing at me and was slowly managing to adapt or at least plan far better for what I new could pop up at any time. I knew I would need very good starting hands and fantastic draws as well as some level of luck over what encounter cards appear early on to even stand a chance against this quest with my decks. To me they are beautiful and powerful but I know they are not even close to the best out there and are more of a balance between theme and power and can certainly struggle when put up against a challenge like this one. As much as I am excited for the next Nightmare Saga Quest (which I actually need to think about and figure out because there is no Nightmare version of Old Forest or Fog on the Barrow-Downs..) I am somewhat hoping it is just that little bit easier than this quest was as this one took many attempts to grind out a win. I am not going to rate the difficulty of this quest because it is a little hard rating Saga quests Nightmare or not. I will say that it is definitely no joke whatsoever and is one hell of a punishing and tricky quest. Just like the original it requires careful planning of who to quest with, who to hide with and who to save for combat as well as where and when to travel to the various locations or when to advance to the next quest stage. Side quests are fantastic against this quest and can help you get ahead quickly. Really all I can say is bring your decks that are at least borderline power decks or are specifically built to deal with this quest’s challenges when playing this Nightmare Quest or it will punish and make a mockery of you for sure!
Not only so that you guys can see exactly what decks I was using against this quest but also to help with recording my first Nightmare Saga win on my new Nightmare Campaign here are the new and most current versions of my decks not yet published on Ringsdb:
Deck 1: The Last Elven Host
Main Deck
Hero (3)
Arwen Undómiel (The Dread Realm)
Elrond (Shadow and Flame)
Galadriel (Celebrimbor’s Secret)
Ally (18)
1x Sulien (The City of Corsairs)
1x Glorfindel (Flight of the Stormcaller)
1x Lindir (The Battle of Carn Dûm)
2x Imladris Stargazer (Foundations of Stone)
2x Northern Tracker (Core Set)
3x Galadriel’s Handmaiden (Celebrimbor’s Secret)
1x Galdor of the Havens (The Treachery of Rhudaur)
1x Gildor Inglorion (The Hills of Emyn Muil)
1x Haldir of Lórien (A Journey to Rhosgobel)
3x Galadhrim Healer (The Dread Realm)
3x Imladris Caregiver (Flight of the Stormcaller)
1x Orophin (Celebrimbor’s Secret)
Attachment (20)
2x A Burning Brand (Conflict at the Carrock)
2x Cloak of Lórien (Celebrimbor’s Secret)
2x Light of Valinor (Foundations of Stone)
3x Miruvor (Shadow and Flame)
2x Silver Harp (The Treachery of Rhudaur)
3x Unexpected Courage (Core Set)
3x Vilya (Shadow and Flame)
3x Nenya (Celebrimbor’s Secret)
Event (14)
3x A Test of Will (Core Set)
2x Dwarven Tomb (Core Set)
2x Elrond’s Counsel (The Watcher in the Water)
3x Elven-light (The Dread Realm)
2x The Galadhrim’s Greeting (Core Set)
2x Daeron’s Runes (Foundations of Stone)
Sideboard 3x Power of Orthanc (The Voice of Isengard)
Deck 2: The Three Hunters
Main Deck
Hero (3)
Aragorn (The Lost Realm)
Gimli (The Sands of Harad)
Legolas (Core Set)
Ally (15)
1x Azain Silverbeard (Flight of the Stormcaller)
1x Boromir (The Road Darkens)
1x Rúmil (The Three Trials)
2x Fornost Bowman (The Dread Realm)
1x Eldahir (The Thing in the Depths)
1x Faramir (Core Set)
2x Naith Guide (The Dunland Trap)
3x Guardian of Arnor (The Battle of Carn Dûm)
3x Gandalf (Core Set)
Attachment (20)
2x Armored Destrier (Temple of the Deceived)
3x Dúnedain Warning (Conflict at the Carrock)
3x Steward of Gondor (Core Set)
1x Sword that was Broken (The Watcher in the Water)
1x The Day’s Rising (The Antlered Crown)
2x Elven Mail (The Three Trials)
3x Gondorian Shield (The Steward’s Fear)
3x Dagger of Westernesse (The Black Riders)
2x Rivendell Blade (Road to Rivendell)
Event (15)
3x Feint (Core Set)
2x Foe-hammer (Over Hill and Under Hill)
2x Hands Upon the Bow (Shadow and Flame)
2x Sterner than Steel (The Flame of the West)
3x Sneak Attack (Core Set)
3x Unlikely Friendship (Sands of Harad)
Player Side Quest (1)
1x Send for Aid (The Treachery of Rhudaur)
Sideboard 2x Dunedain Remedy (The Drowned Ruins)
Campaign Choices:
I have to be strategic with my campaign choices as this is just the very first leg on a new and exciting Nightmare version of the Saga Campaign. Admittedly I am very experienced with the regular versions of the Saga quests and I have played right up until the end of Flame of the West in campaign mode on several occasions. I have perfected (regardless of how many attempts it takes each time!) escaping Moria before the Balrog ever appears, replaying Breaking of the Fellowship until Seat of Seeing is explored and I can remove a burden from the campaign pool, beating the near unbeatable Helm’s Deep and ensuring that throughout the campaign I take as few burdens as possible and also take the most beneficial boons to my particular decks. All of this is helpful but honestly does not prepare me for the Nightmare Campaign at all. We don’t even have the entire Campaign to the end yet and are a few boxes further behind as far as Nightmare is concerned so we truthfully have no idea what is coming in the Nightmare Campaign!
I do know that you have to face the Balrog to win in Nightmare Journey into the Dark though and that is one thing I am seriously dreading as the version of the Balrog in that quest is potentially the fiercest foe in the entire game! Who knows what else we will have in store for us down the line!
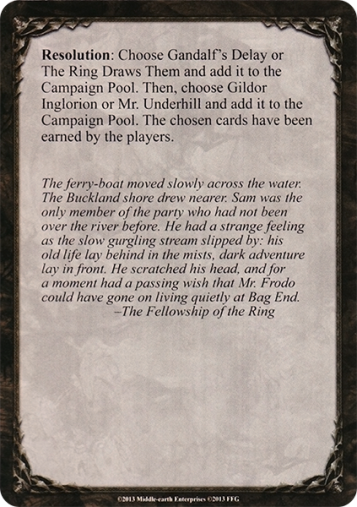
I decide to go with my gut in the end and choose Mr Underhill (even though early boon Gildor was extremely helpful and I completely forgot to even USE Mr Underhill during my eventual win…) as my boon considering I can’t have both copies of Gildor in play at once and The Ring Draws Them as my burden as taking one less card in my starting hand for the rest of the campaign (or until the burden is removed from the pool at least) thanks to Gandalf’s Delay is just incomprehensible and just way too much of a set back. The Ring Draws Them might not even appear in many games, can fizzle or can do very little under the right circumstances. Gandalf’s Delay is always going to be a serious setback regardless of what other encounter cards you see in any given game.
My current campaign pool is now as follows:
Boons
-Mr. Underhill (attached to the Ring-bearer during setup)
Burdens
-The Ring Draws Them (shuffled into the encounter deck during setup)
I really hope you enjoyed this new Nightmare Review, my new decks and the first steps of my Nightmare Campaign! Next time I will move on to Nightmare A Knife in the Dark, most likely with a brief report and catch up on how I went with Old Forest and Barrow-Downs so long as I decide to play them, and will continue my Nightmare journey!

Aragorn: Hello Ringbearer!
Frodo: Who are you? What are you doing at my doorway?
Aragorn: I’m Aragorn, son of Arathorn, and if by life or…
Frodo: Okay, okay! What are you doing here?
Aragorn: I came to bring the Ring to safety in Rivendell.
Frodo: Nice offer, but I was already going with Sam and…
Aragorn: Those noobs can get fired! We are the professionnals! This is Legolas from Mirkwood, this is Gimli son of Glóin, this is Elrond Lord of Rivendell and his daughter Arwen and that’s Galadriel Lady of Lórien! We will assemble an army of whatever we can think of and march to Rivendell taking down every servant of the Dark Lord we encounter!
Frodo: Wouldn’t it be more prudent to sneak pass them?
Aragorn: That’s a silly idea!
LikeLiked by 1 person
Haha love it! I actually once started on this project of writing a brief retelling and alternative history to Lord of the Rings based on the line up of heroes used during my Saga Campaign at the time to somewhat explain or justify the use of said heroes. I didn’t get very far and ended up abandoning the project but here is a little snippet of the beginning:
“Although ultimately it is Frodo the Hobbit, who travels to Mordor and destroys the one ring in the fiery cracks of Mount Doom, and Aragorn, Son of Arathorn who unites all free peoples of the West and brings peace and unity to Middle Earth, little is told of the fearless band of Elves who started Frodo on his Journey and also helped Aragorn travel the paths of the dead and destroy the Corsairs of Umbar. If it were not for their valor and battle prowess Middle Earth surely would have fallen to Shadow. This is their tale.
It had been a great many years since Elrond had left Rivendell. A great warrior and commander of Elvish hosts during the Second Age, Elrond had left this past behind after the War of the Last Alliance to rule over Imladris and guard over what remained of Isildur’s bloodline. Staring back at the trail to his beloved hidden city, Elrond Half-Elven despaired at what was to become of not just these beautiful Elvish lands but potentially all of Middle Earth in the war to come.
He had acted fast upon receiving the news from Gandalf that the One Ring had been found and had gathered his Sons and Glorfindel and set out immediately for The Shire. He sent Erestor to Lothlorien to speak to Galadriel and Celeborn and sent Gildor to speak with Thranduil in Mirkwood to request they both send emissaries to Imladris. Haldir from Lorien who had been visiting Rivendell at the time decided that he would join Elrond on his journey to The Shire to help out and also to act as the eyes and ears of Galadriel and Celeborn. Gandalf had told Elrond all about the brave hobbit currently in possession of the ring and Elrond was not surprised at all to find out it was the nephew of Bilbo Baggins; Frodo Baggins. Not content to simply wait around while mankind ensured its own doom Elrond was planning to accompany and lead the ring and its hobbit guardian back to Rivendell where they could hold counsel and come up with a plan. After Isildurs refusal to destroy the ring at the end of the War of the Last Alliance Elrond considered both Men in general and to a lesser degree himself responsible for the Ring’s survival and therefore the survival of Sauron as well. He would not let Men or himself fail in this quest again and further contribute to Middle Earths demise.
Avoiding Bree and the ruins of Arnor Elrond and company rode through the South Downs and approached The Shire from the now overgrown and rarely used Green Way. He had heard that the Dunedain guard Sarn Ford and wanted to avoid any spies of the enemy on his way to the Shire at all costs. It had been said that Nazgul were recently seen throughout the land constantly riding and searching. It seemed the Dark Lord knew the ring had been found but was not sure of its location just yet.”
LikeLike
Man, this was exhausting. Only after a fair amount of losses I realized what it takes to beat this quest with any consistency and it takes a lot of control. There’s definitely a need to turtle a bit at stage one, advance precisely when you’re ready and blitz trough stage 2. Protector Of Lorien proved to be extremely useful card; precise card dumping in Noldor deck can result in 6WP turnaround per one PoL and you can have three of them, which can be devastating for poor Encounter Deck location lock strategy.
LikeLiked by 1 person